File Manager
You can find the file manager in the Media Menu, at the top right of the screen.
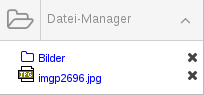
File Manager
You can upload files to your LIMBAS application. The files are managed using the File Manager. Besides the standard features of a File Manager such as delete, copy, etc., is a convenient search function, which also scans the file contents. Files have to be indexed in order to use this functionality. Which files are indexed is defined by the ADMIN. Only 'you' can access files stored in 'My Documents'. Files in the Public Folder can be edited by multiple users or User Groups. Authorization is granted by the ADMIN. Files linked to data records or reports created with LIMBAS can also be managed and edited using the File Manager. A converter is available. Files can be converted e. g. from JPG to PDF. All files will be backed up with all other LIMBAS data.
File Manager Navigation shows
- My Documents
- Public Folder
- Tables (gray folder icon)
- Folder for report results (Yellow Folder Icon) Folder for files that are attached with data records (Green Folder Icon)
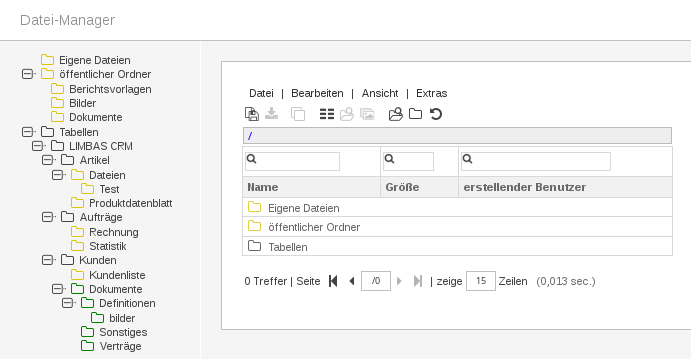
Fig.1: File manager
The period, a file stays locked, is defined by the ADMIN. Alternative method is, to lock the file manually for a chosen period (File -> Info) and then download it. As soon as you upload the file again, it will be automatically unlocked. Files with a red 'Lock Icon' are locked by another user.
Menu Bar - File Manager
File Menu
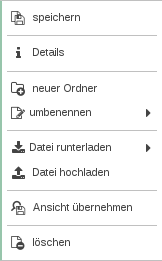
Save
Changes will be saved.
Info
Properties of the selected file are shown. The details shown depend on the file type.
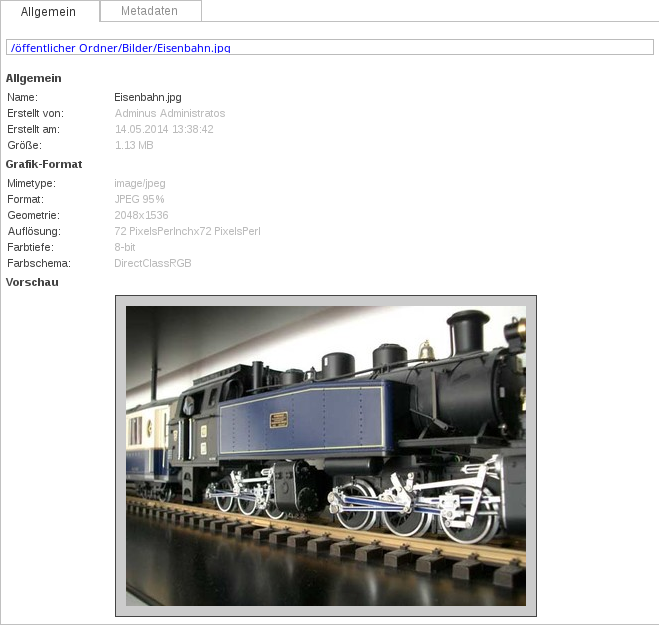
Fig.2: File manager edit menu file/details
General (Example for a graphic file, Fig.2)
| File info | File name, created by, creation date, file size... |
|---|---|
| attributes | checked released blocked. The use of these attributes is application specific. Favorite, file will be shown as favorite in the Media Menu -> File Manager OK Button to confirm new or changed attributes. |
| Graphic format | Mimetype, format, geometry.... |
| Color table | |
| Preview |
Metadata
Metadata are displayed in the same way as a data record of a table (default view) and can be modified accordingly.
New Folder
Select a folder, File -> New Folder. A pop-up window appears , edit the folder name and click OK. To create a public sub folder you need the relevant access rights.
Rename
Select a folder or a file, File -> Rename. A pop-up window appears, enter the new folder or file name.
Download File
Select one or several files , File -> Download File. Choose the file format you want to create. At the moment you can choose between zip, tar.gz, tar.bz2 or 7z.
Alternative: You can also right click the file name, and choose the command Open (read only) or Save As from the Context Menu.
Upload File
Select how many files you want to upload (max 10). Use the BROWSE button to select the file you want to upload When all files are selected, click the UPLOAD button to transfer the files. When uploading an archive, you have the choice to either upload the archive zipped or extracted file per file.
Apply View
After changing the folder view (e.g. displayed fields have been modified) you can decide if this view should be used for all folders.
Delete
Selected files will be deleted. Requirements are that you have the authorization and that the files are not linked to any data record.
Edit
Search
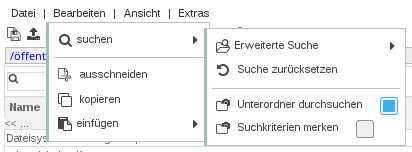
Fig.3: File manager edit menu edit/search
| Advanced Search | Edit search criteria |
|---|---|
| Sub folder | Include all sub folders |
| Remember search criteria | Search criteria are available until the end of this session (sign out or reset) |
| Reset search criteria | Reset all search criteria and list all documents |
The search criteria are also used in the same way as they are in the Record List (see Record list edit menu - Search).
Cut
Move files and folders from one location to another. Select files /folders, click Edit -> Cut, choose in the Navigation Pane the new location, click Edit -> Insert. The selected files / folders will be pasted into the new location and removed from the original location.
Copy
Copy files and folders from one location to another. Select files /folders, click Edit -> Copy, choose in the Navigation Pane the new location, click Edit -> Insert. The selected files / folders will be copied into the new location.
Insert
Files / Folders that are either cut or copied will be pasted in the selected location.
View
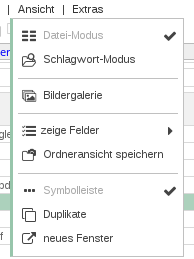
File Mode
This is where the contents of the current folder is displayed. The standard details (default) shown are file name, file size and created by. Depending on what is chosen in View -> Display Fields this can vary.
Key word mode
Display of indexed files that match the keywords (=search criteria). The ADMIN defines which document types and folders are indexed. The indexing is done in a batch job that runs usually during the night, to avoid application load.
| Cs | Case sensitive | Upper and lower case considered |
|---|---|---|
| Ts | Contains – part of the word is considered | |
| Snd | sounds | Sounds like |
| sub | Include sub folders in the search | |
| and / or | Operator to link the keywords 'all selected subjects'= AND, 'at least one of the selected subjects' = OR |
Example: Search Keyword
Search for all documents in the public folder that contain either the word 'impuls' or 'Audit'. Upper and lower case and part of the word have to be considered. The corresponding documents will be listed and the keywords will be highlighted.
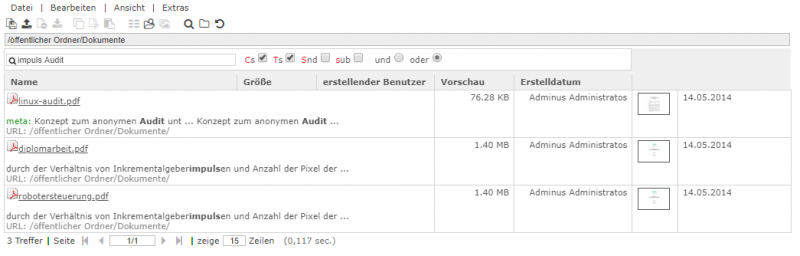
Fig.4
Picture Gallery
Shows small icons of the images. Single mouse click on the thumbnail and a larger image will be displayed.
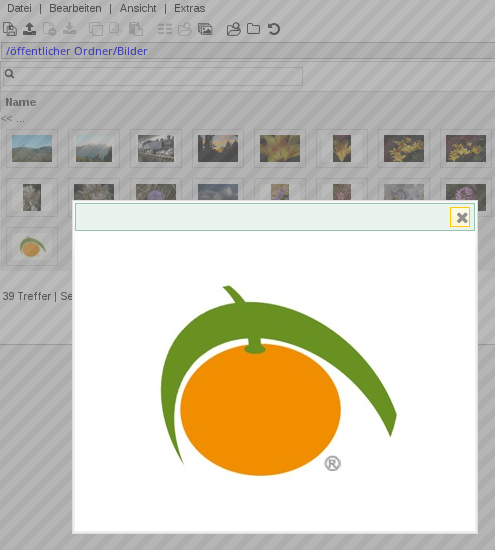
Fig.5: File manager edit menu view/picture gallery
Display Fields
Selected fields are displayed. Selected fields are ticked. Click on View -> Display Fields and select a field (that is not already ticked) with a mouse click. The selected field will now be displayed in a different color. (In the example, the color changes from black to green). To confirm this change, press the return key. You will now see, that the content of this field is also displayed. Click again on View -> Display Fields and you will see, that the field is ticked. If a field should no longer be displayed, Click on View -> Display Fields and select the field that should be unticked, again the color of the selected field changes (in the example from green to black), press return and the field will no longer be displayed.
Example: change the displayed fields.
CREATED BY should no longer be displayed.
INFO should be displayed.
starting situation
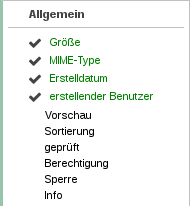
click
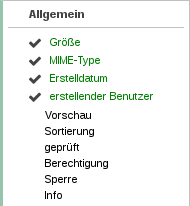
Color changed
RETURN
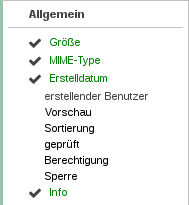
Changes confirmed
the selected fields are ticked/tick removed
GENERAL FIELDS are file size, mime typ, created on, created by, sorting, checked, released, disabled, preview and info. Further groups are GRAPHIC-FORMAT, DESCRIPTION, KEYWORD, CATEGORY, IMAGE RIGHTS, ORIGIN and COPYRIGHT.
Note: The preview displays the file as a small icon. This feature should be used carefully, as depending on file format and number of files displayed it can have an input on the performance of your LIMBAS application.
Example: File Manager with PREVIEW
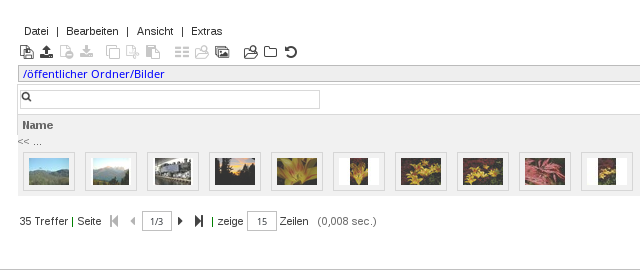
Fig.6: Edit menu File Manager file view with PREVIEW
Save folder view
Save the current settings, to keep personal settings.
Toolbar
Show or hide toolbar
New Window
File Manager will be opened in new browser window.
Extras
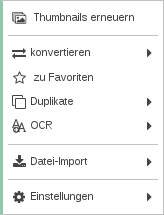
Refresh Thumbnails
Reload Thumbnails
Caution: Runtime. Depending on file format and number of files displayed it can have an input on the performance of your LIMBAS application!
Convert
Convert selected file into an image file . Determine the width in pixel and choose one of the following types. .jpg / .png / .pdf / .html
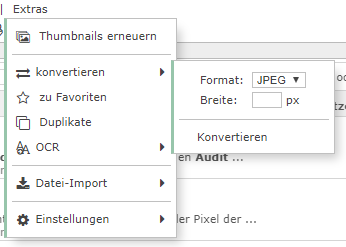
Fig.7: Edit menu File Manager extras/convert
- Choose file typ: .jpg or .png and define picture width in pixel, click on Image. Preview in new browser window. To save the file – right click the image preview and choose 'Save image as' in the context menu.
- Click PDF: new browser window with pdf file opens. File can be saved.
- HTML: (Not all file formats can be converted to HTML)
Favorites
To add a file or folder to the favorites in the Media Menu / File Manager, select the file or folder and go to Tools -> Favorites. To remove a favorite, click the 'x icon' next to the favorite you want to remove.
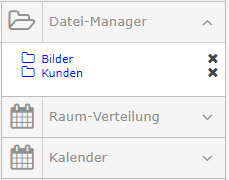
Fig.8: add data to favorites
Duplicate
Display of duplicated files.
Caution: Only select FILES. Duplicate shows files with the same contents. DO NOT SELECT FOLDERS.
OCR
Optical Capture Recognition in image files. The prerequisite is that the OCR module is installed. (No further description, as the OCR modul in not implemented in the standard LIMBAS application).
The selected files are printed on the selected printer.
Settings
FORCE DELETE
This command is only available to selected users. Force Delete will delete a data record and all linked data records, as long as the linked records have no further links. E.G. Data record CUSTOMER Computershop is linked to CONTACT Mr. Smith. CUSTOMER Computershop will be deleted. FORCE DELETE will also delete CONTACT Mr. Smith, as long CONTACT Mr. Smith is not linked to any other Data record.
Toolbar File Manager
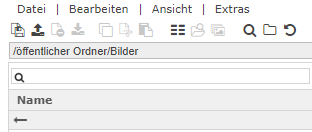
Fig.9: Toolbar File Manager
From left to right:
- Adapt Data
- Create/Upload a new file
- Delete File/Folder
- Download File/Archive
- Copy File/Folder
- Move File/Folder
- Insert File/Folder
- Explorer View
- Search Engine View
- Picture Gallery
- Advanced Search
- Mini File Manager
- Reset Search Criteria
- Folder View - 1 level up