Queries
- display table contents in an easy, more comfortable way than in the standard table structure
- simplify database access for complex dependencies from different tables.
- are implemented as a database view and do not require any additional disk space.
- do not allow you to add, modify or delete table contents displayed in a query.
Query Wizard
The query wizard consists of the following five tabs:
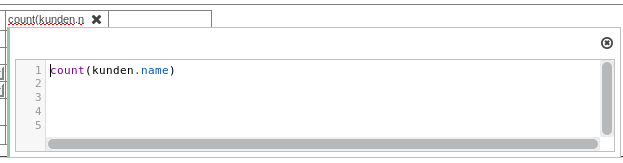
SQL
The specified SQL statement is used when you open (display the table contents) this query.
- Save: The SQL statement is saved; the data for the graph in the query editor are NOT matched.
- Check: The SQL statement is executed to detect possible errors. If the statement is error-free, the button is then displayed in green. Otherwise, the error message of the database appears.
- Create query / replace / delete: If the statement is error-free, the database view can be created / replaced / deleted via these buttons.
- Publish: If the database view was created, the query can be published via this button in Limbas. This allows it to be presented as a normal Limbas table (forms, reports) and authorized, but has a limited scope of functionality (no addition / modification / deletion of records, no resubmission). If the query has been published, the button will appear green. If the query should not be published, it can still be used as a basis for further queries.
Query Editor
The query editor provides a graphical interface to simplify the input of the SQL statement for a query.

- The work area of the query editor is divided into
- Top Panel for the display of the tables used in the query or queries and their relationships.
- Bottom Panel with a table, where the fields of the query to be generated can be entered. The order of the fields can be changed by drag & drop. Following properties are displayed , if available, for each field in the query:
- Field Name: Field name in the referenced table or query. When manual setting the query field (see below) in some cases may also show the name of the referenced table or query and SQL function to execute.
Note: If a field with the same name is used several times in the query editor, each additional field must be aliased. - Table Name: Name of the referenced table or query, if the query-field was set by drag -and-drop. (see below)
- Field Name: Field name in the referenced table or query. When manual setting the query field (see below) in some cases may also show the name of the referenced table or query and SQL function to execute.
Right-clicking on the field name opens an extended SQL editor with syntax highlighting.
- Alias: Column header used for this query field
- Function: If one of the possible functions (grouped/sum/min/max) is selected, it is used for the query-field. Please note, this can affect also other query fields.
- Sort: The setting is a default sort. It is used only in LIMBAS user view if there is no other sort specified. If there are several fields set for sorting, the field that is leftmost entered in this table is prioritized.
- View: When enabled, the content of this field is displayed when the query is executed. (Field is taken into account in the SQL query in the SELECT). When this option is disabled, the content of the field can only be used for functions, sorting or displaying criteria.
- Criteria: The conditions specified here appear in the WHERE clause of the SQL call. When calling the query a data record is taken into account only if the content of the field corresponds to the conditions. If a value without an explicit comparison operator is entered, the content of the field is automatically checked for equality (=) to the specified value. Alternatively, a comparison operator followed by a value must be entered.
For keyboard input in the fields ‘Field Name’ and ‘Criteria’ the corresponding row appears for a short term ‘greater’. When the data has been entered, the display returns to its original proportion.

- The following actions can be performed in the query editor:
- Add a table or a query to be used for the query:
A list of all LIMBAS tables and queries is displayed when clicking with the right mouse button into the top panel of the work area. At the end of the list, you can choose to select if system tables should be included or not. When clicking with the left mouse button on one of the listed tables or queries, it is inserted with the related table or query fields as a block that can be moved in the top work area.
- Remove a table or query from the upper area:
If a table or query is not required for the query to be created, it can be removed with a mouse click on the x icon in the upper right corner of the appropriate block.
- Link together fields from two tables or queries of the Top panel:
If a table or query-field is moved by drag & drop into a field in a different table or query, a link (join) will be created for these 2 fields. This is displayed by an arrow pointing in both directions between these fields.
- Remove / adjust the type of the link:
Click on the arrow of a link, a pop up window appears, to remove the link or change the type of this link. The default setting for a link is ‘INNER JOIN’.
- Save the display settings of the top panel of the workspace
Press the ‘Return’ key to save the displayed tables with all items and links.
- Add a query field (that should be displayed when calling the query):
- Drag & Drop a table or query field from the top panel of the working area, to the blank right hand column of the table in the bottom panel of the work area and it is added to the query fields. The default settings for this field are entered. A new blank column is added for additional query fields.
- query fields, a new query field can be entered manually into the blank right hand column. Instead of the field name, the function to be executed has to be entered. The referenced table or query must be specified. The row for the table name stays empty.
- Remove a query field:
A Query field can be removed from the bottom panel of the work area by clicking on the x icon on the right side of the top of the column.
- Save: An SQL statement is generated from the corresponding setting that overrides that of the SQL tab.
- Add a table or a query to be used for the query:
Preview
Executes the statement from the SQL tab and displays the content.
===Options=== Additional parameters allow special settings for the query. ====Event==== With the help of a separate event, the action can be adapted to a double-click of a result line. The function expects a “Javascript syntax”. Examples:
- Output of an alert: return “alert (‘helloworld’);
- Open a record of the table with ID 2 and the record with ID of the field content of the ID 2: return “document.location.href = ‘main.php? Action = gtab_change & gtabid = 2 & ID =”. $ Gresult [$ gtabid] . [$ bzm] “‘”; Open a record in a new file of the table with ID 3 and the record with ID of the field content of the ID 5: return “open(‘main.php?action=gtab_change>abid=3&ID=”.$gresult[$gtabid][5][$bzm].”‘,’test’,’toolbar=0,location=0,status=0,menubar=0,scrollbars=1,resizable=1,width=600,height=600′)”;
Parameters
In this field you can set PHP variables for the parameterized queries.
Special Case: Parameterized Queries
Parameterized queries allow the underlying SQL statement to be filled with values dynamically before execution. These values are put into the statement by PHP variables. Example:
SELECT
    kunden.id,
    kunden.name,
    kontakte.id,
    kontakte.name
FROM
    kunden
    JOIN VERK_17e64eb8914c6 verk ON kunden.id = verk.id
    JOIN kontakte ON (
        verk.verkn_id = kontakte.id
        AND kontakte.sprache = '" . $extension["params"]["language"] . "'
    )
In order for the query to be checked for correctness, you must enter example values for all the PHP variables used in the options tab:
$extension["params"]["language"] = "deutsch";The variable name can be chosen freely, but no other PHP variables should be overwritten. It makes sense to use the $extension’variable, as it is also the eighth parameter of the get_gresult function. In a Script Extension it is easy to set the value:
$extension = array();
$extension["params"]["language"] = $session["language"];
$gresult = get_gresult(42 /* view-id */, 1, null, null, null, null, null, $extension);
Limbas treats the query as a parameterized query only if the parameter field in the options tab is not empty.
Primary Key Field
Because queries typically return a result intersection from different tables, there is no primary key as in a physical table. In order to be able to work with queries such as with a table, however, a field is needed with which a clear assignment to the result series is possible. If a query is published and no primary key field is defined, an attempt is made to find the correct record via a table pointer. This assignment is slow and applicable only to a limited set of results. The field name of any key field can be entered via the table / view settings. This field must be of integer type (e.g., INTEGER, LONGINT, BIGINT). If the query does not have a unique field of type Number you can use several fields to create a new field. Limbas does NOT support text keys.
Example:
select
    (extract(
        epoch
        from
            MYDATE
    ) || to_char(MYNUMBER, 'fm000000')) :: BIGINT as  NEWID
from
    MYVIEW
select
( to_char(MYNUMBER1, 'fm100000') || MYNUMBER2 ) :: BIGINT as NEWID
from
MYVIEW